> For the complete documentation index, see [llms.txt](https://imagoworks.gitbook.io/dentbird-studio/llms.txt). Markdown versions of documentation pages are available by appending `.md` to page URLs; this page is available as [Markdown](https://imagoworks.gitbook.io/dentbird-studio/quick-start/automate-ct-segmentation.md).

# Automate CT Segmentation

*AI-Based Automatic Segmentation for Inferior Alveolar Nerve, Bone, and Skin*

{% hint style="info" %} <mark style="color:blue;">**Quick Guide**</mark>

Experience CT Segmentation with Dentbird Studio by importing a sample.
{% endhint %}

{% @arcade/embed flowId="uCTPJdaLtAAf8M2fd71W" url="<https://app.arcade.software/share/uCTPJdaLtAAf8M2fd71W>" %}

## How to automatically segment the bone from CT scans

### Instructions

#### Step 1

Click the \[CT Segmentation] button on the main menu.

<figure><img src="https://4044190336-files.gitbook.io/~/files/v0/b/gitbook-x-prod.appspot.com/o/spaces%2FtqpMmwKqHLYPwTeQTRCE%2Fuploads%2FQrT6xUf3QBlKurKSVP9G%2Fsegment1.png?alt=media&amp;token=4e74e5c1-d60a-4c2d-b7ec-0163fb9db9cb" alt=""><figcaption></figcaption></figure>

#### Step 2

Choose the specific anatomical feature you wish to segment from the volume data, then press \[Segment].

<figure><img src="https://4044190336-files.gitbook.io/~/files/v0/b/gitbook-x-prod.appspot.com/o/spaces%2FtqpMmwKqHLYPwTeQTRCE%2Fuploads%2FNDnwzOTli3DZwyWOVl94%2FBone%201.png?alt=media&amp;token=b0f7c1f8-e285-4b7c-84f5-1092f1c9030c" alt=""><figcaption></figcaption></figure>

#### Step 3

Upon completion, the color of the volume data will change, indicating that the mask has been generated. You can view the generated mask data in the Mask list.

<figure><img src="https://4044190336-files.gitbook.io/~/files/v0/b/gitbook-x-prod.appspot.com/o/spaces%2FtqpMmwKqHLYPwTeQTRCE%2Fuploads%2FOObY6CkvhyzoItfdpztB%2Fmask1.png?alt=media&amp;token=ef432a09-1619-4195-a228-902b27ce1237" alt=""><figcaption></figcaption></figure>

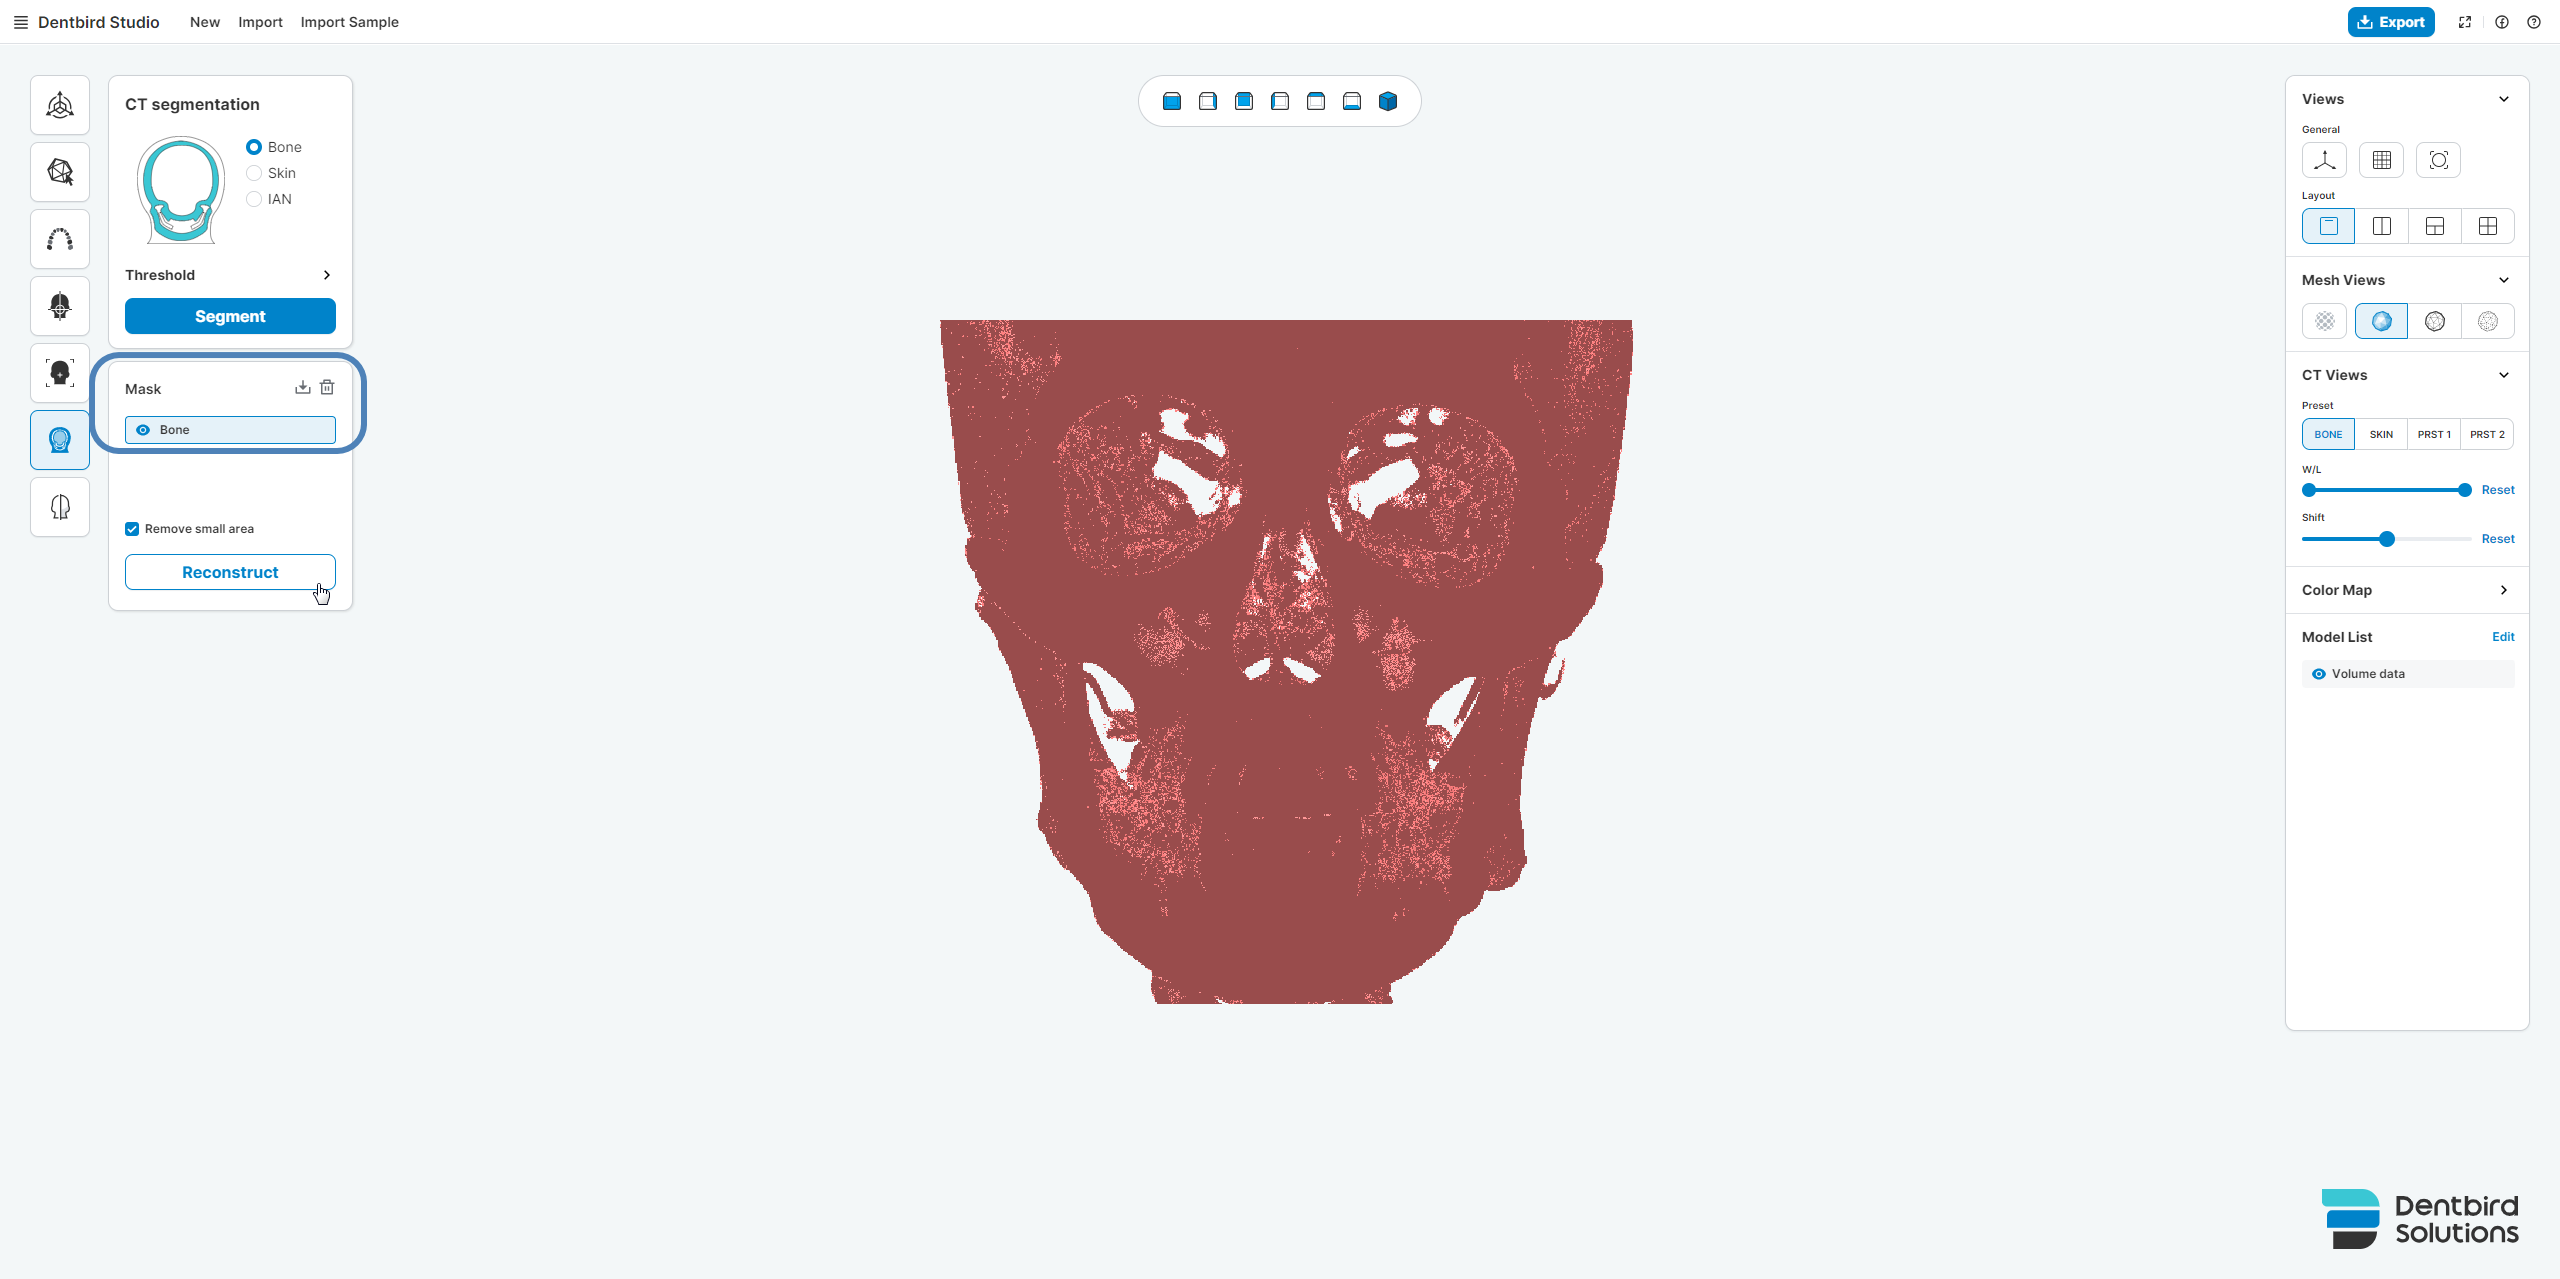
#### Step 4

From the Mask list, select the mask you wish to convert into mesh data, then click the \[Reconstruct] button.

<figure><img src="https://4044190336-files.gitbook.io/~/files/v0/b/gitbook-x-prod.appspot.com/o/spaces%2FtqpMmwKqHLYPwTeQTRCE%2Fuploads%2FMe5WdFplvWBFLfL2F5md%2Freconstruct1.png?alt=media&amp;token=6e81780b-94c7-459c-b783-8e4a4af5ee27" alt=""><figcaption></figcaption></figure>

#### Step 5

After the mesh data is created, the appearance of the volume data will be altered, and you can verify the addition of the mesh data in the \[Model List] located on the right side of the screen.

<figure><img src="https://4044190336-files.gitbook.io/~/files/v0/b/gitbook-x-prod.appspot.com/o/spaces%2FtqpMmwKqHLYPwTeQTRCE%2Fuploads%2FrCtIdzwmtdwxuh7I0M7u%2FMesh1.png?alt=media&amp;token=711bd153-6fb5-4414-99ea-6ffbbdc11610" alt=""><figcaption></figcaption></figure>

**Last updated : 2024.05.30**&#x20;